User Tools
This is an old revision of the document!
Getting started with the Projucer
The JUCE Projucer is a code and IDE-project generator. You specify what kind of project you want (e.g. GUI application, Audio Plug-In, etc.), and the target IDEs you intend to work with (e.g. Visual Studio, XCode), plus some other details such as a project name, and the Projucer will generate a complete project/solution for each IDE, including a few “starter” code files. You can then open each project/solution in the appropriate IDE, click on “Build” and within a few minutes have a working app or plugin for your target platform.
Well, that's the theory. In practice, there are lots of little details to understand, which can be overwhelming when you're just getting started. On this page I'll take you step-by-step through building a synthesizer plugin for Windows (VST v2.4) and Macintosh (AU v2).
Running the Projucer for the first time
The first thing you'll see, when you run the Projucer for the very first time, is the “Create New Project” page, shown below. On subsequent runs, you'll most commonly see the last .jucer project you had open, which the Projucer remembers. To create a new project, go to the Projucer's File menu and close whatever project is open, then choose “New Project…”
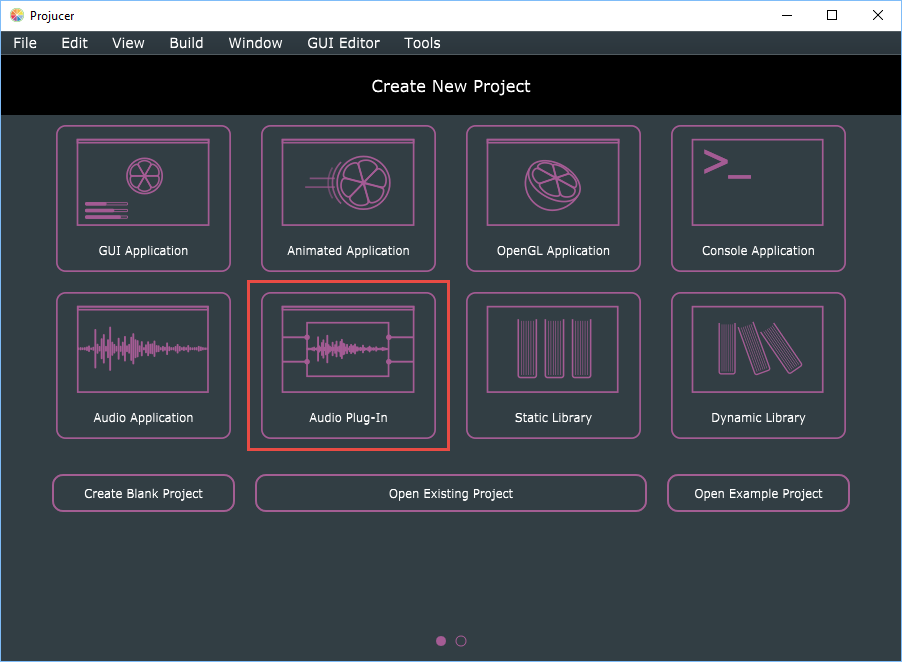
The Create New Project page has eight large graphic buttons for the eight most common project types. Click the button labeled “Audio Plug-In”, which I have outlined in red in the screen shot above. This will take you to the “second half” of the Create New Project page, as shown below. (Note the two pink circles at the bottom of the screen shot; these indicate that the page has two parts, and you can go back and forth between them by clicking on the circles. The filled circle indicates the currently-shown part.)
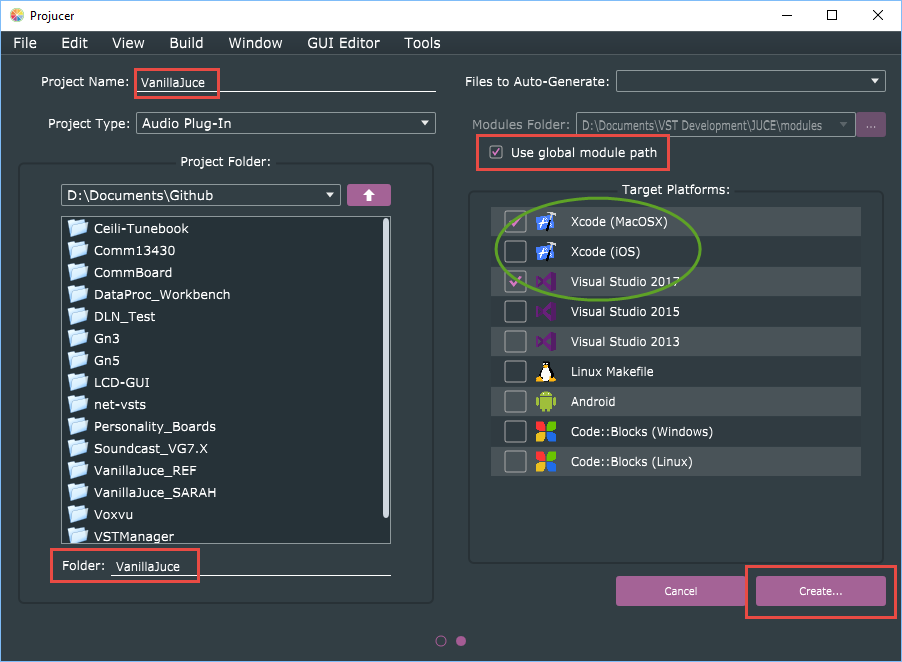
The first time you try the Projucer, when you haven't a clue what any of this means, it can be a little daunting, but it's actually straightforward:
- Start by using the large folder-navigation box on the left (it works just like an Explorer/Finder window) to choose the folder in which you want your new project's folder to be created.
- The label “Project Folder” is a little confusing; I started by creating a new folder for my new project and selecting that, and ended up with a folder called “VanillaJuce” inside another folder called “VanillaJuce”.
- What you want to see in the combo box just under the label “Project Folder” is actually the path to your “projects folder”. The Projucer will create a new folder for your new project inside this one.
- After selecting your projects folder, go to the “Project Name” field at the top left, and type the name of your new project, in my case “VanillaJuce”.
- Whatever you type will automatically appear in the “Folder” field at the bottom left, i.e., the default name for your new project's folder is the same as the name you choose for your project. If you want a different folder name (but no change to the project name), you can type something different in the “Folder” field.
- You can ignore the “Files to Auto-Generate” item at the top right; it isn't used for Audio Plugin projects.
